First ever post. There are so many things that I want to do in this house. When we moved in, I saw projects everywhere. One morning I opened the medicine cabinet and noticed the door dragged. I didn't just tighten the hinge to fix the problem. I thought, "here is an easy project to start on." I decided to redo the cabinet. I am a family man and can only find an hour here or there to work on things. This ended up taking me about six weekends.

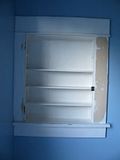
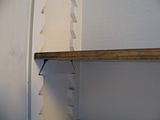
The cabinet is original to the house and is 95 years old. It had a thousand coats of paint and the original mirror. The mirror was foggy like old mirrors get. The shelves were actually an interesting modular design but the pegs had been painted over so many times that the shelves were fixed-in-place. I used a razor blade and ripped out the shelves. Then my father-in-law used his woodworking tools and made new matching shelves and pegs.
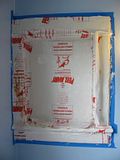
Also, newer paint was latex. Painting latex over old oil-based paint is a bad idea. It was peeling off and using just my fingernails I could peel off the top coat of paint. The old lead and other oil paint was much harder. I have an infant in the house and don't want to sand or scrape lead paint. I used Peel Away with much success. It takes a lot of product and can get expensive but it does work well.

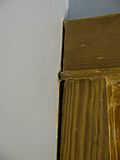
After stripping the paint, I was less than impressed with the wood underneath. It had many imperfections and original patch areas. It became obvious this was "paint quality" wood and had always been painted. I decided to stain a dark walnut. I covered the imperfections, of which there were many, the best I could using self-mixed acryclic paints from an art supply store. I put the paint on after staining but before applying polyurethane. After staining and touching up, I applied about five coats of a high-gloss polyurethane.
Regarding the mirror, I didn't want to lose the look of the antique beveled mirror, but I couldn't keep such a lousy-functioning mirror. I took the advice of my e-mentor and used muriatic acid to take the silver off of the old mirror. It also took some scraping with a razor blade. After using the acid and scraping, the old mirror was a nice piece of glass. I then had a local mirror place cut a custom-sized 1/8" mirror that I placed behind the old beveled glass. It cost $18. So, I have the original glass but a new mirror. The original glass plus the mirror is very heavy, but the mirror is perhaps the part of this project that I am most satisfied with.
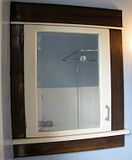
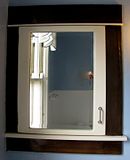
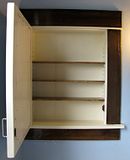
These are the "after" photos. The result is okay. The cabinet is much more functional than before and the mirror looks nice. This is the first I have worked with stain and polyurethane. There are many imperfections, but I am satisfied for this being my first project.
Now that the medicine cabinet is done, we really need to paint the walls. That blue is horrible. You don't even want to see the matching curtain.
BEFORE & AFTER
 Something we have loved about this house since we moved in is the nicely finished basement. Being able to pull off a decent finished basement in a 1915 house is no small feat. The PO did a nice enough job with the basement, putting craftsman-esque six inch trim around the built-out glass block windows, etc. The basement is where we watch TV and use the computer. Yet since we moved in, our only upholstered furniture was a futon with hard wooden arms. Since we don't have a lot of money right now, we looked at craigslist forever, we even looked at a couple of couches in person. We just couldn't find anything at all. So yesterday we headed to ikea and bought a kivik sofa plus chaise in orange. The upholstery is removable and can be dry-cleaned or replaced. A nice feature what with the cats and kids.


